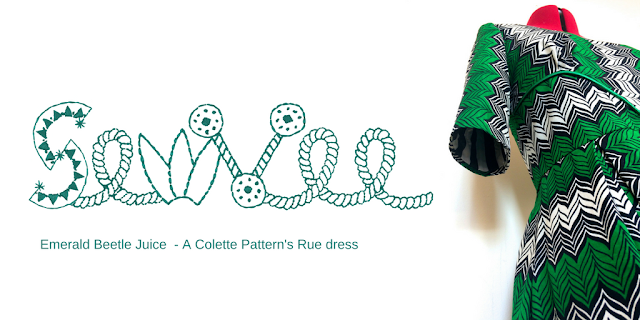
I had just the fabric in mind. Before Christmas, I had the pleasure of visiting Dalston market in London with Gabby, Lisa, Megan and Rhiannon. You can watch the video of our adventures on Gabby's channel here. There were several African Wax stalls...
 |
| ... ALL the smiles. In my element. |
My gut told me I'd have enough of the 6-yard piece to sew me a Rue. I was right, just, but it was an awful squeeze, and I had to create a seam down the centre front to get the pattern placement I wanted.
Anyway first for the fitting...
I cut a straight size 0 from my stash of old curtain lining. My main concern was that bust seam, but I was pleasantly surprised. I believe Colette draft for a C cup, so I avoided a time-consuming FBA and the fit was pretty good straight out of the packet. It came out a little big at the waist, so I divided the excess between the side and back seams. However, the real problem fell in the sleeve and shoulder area. After my fella had pinned me in my toile I was unable to fully lift my arms without the whole bodice coming with it. Nobody likes limited arm movement.
This is a fit problem I have encountered previously - particularly in Sew Over it patterns, but I haven't had the courage to tackle it till now. After speaking to Tiniest Stitcher while in London, it clicked - you simply add more fabric under the arm to allow more movement - of course! Thank you, Lisa! This is why fitted vintage dresses tend to have a less severe drop from the sleeve head to the underarm (or they have arm gussets). Modern sleeves are cut with less ease to give a more flattering fit, but they can be a little restrictive. (Disclaimer: I am no expert!) Below is how I added fabric to the underarm without too much unsightly bunching when the arm is lowered The dotted line shows the original pattern line).
After a little trial and error, I raised the underarm section of the armhole by 6/8". I assumed I should then add the same amount to sleeve underarm, but I found that the sleeve head was too large to fit in the arm hole. After some experimentation, I found that doubling the measurement seemed to work (in my case anyway). Therefore I raised the sleeve underarm by 1.5" and smoothed the curve with a french curve. I then walked around the sleeve to check the fit, marking the notches as I went. I think, after some googling, that about 1" of ease in the sleeve head is about right for a fitted sleeve.
At this point, I was confident enough to dive straight into my lining fabric. My chap pinned me in again to check the fit - love and behold I could move my arms freely!
I obviously wanted to match the stripes where I could, and with some real strategic cutting, I was really really pleased with my results.
 |
| I got the chevron to run right down the centre of each sleeve. |
 |
| Piping made using satin bias binding. |

I was super happy with my stripe placement on the bodice. I got the chevron stripe running right around the waist matching at the side and back seams.
After cutting, the dress came together quickly. I've developed a naughty habit of not looking at dress pattern instructions at all when I sew. This is exciting as there was a time when I thought I'd never be at this stage, but it does mean I am a bit set in my ways of doing things. Lining a dress, for example, is so automatic to me I don't even stop to think about it! This, however is one of the selling points of this pattern as it gives step by step instruction on how to fully line your dress - but I obviously cant vouch for how clear these are!
Anyway, I lined the bodice in a cotton lawn from Fabric Godmother. I decided not to line the skirt as I have just invested in a really good slip and I am struggling to find affordable lining fabrics that I like at the moment (do let me know if you have any suggestions).
Right - I think I'm done, so I'll get on with showing you some pictures of the whole dress:
Thank you for the naming her Emerald Beetle Juice, Elle :)
As always thank you for reading and lots of love till next time
Vic x


I actually like using the African wax prints as lining, because It's very inexpensive and fun fabric!
ReplyDelete